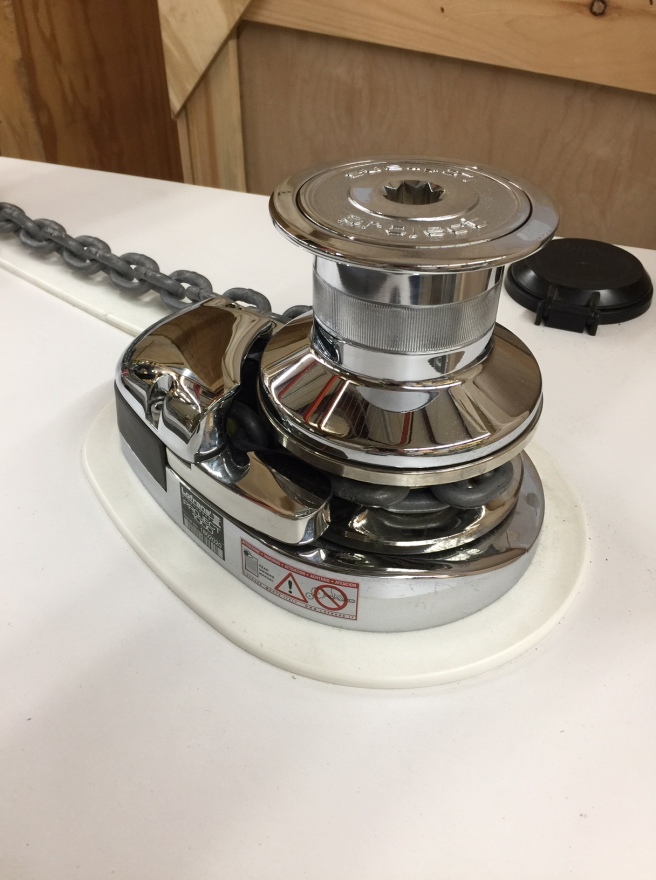
If you have a 20-year-old mid-sized Sea Ray boat, chances are you may be ready for an anchor-windlass upgrade. Imtra anchor windlass expert Jim Thomas explains.
From 1995 through 2003, Sea Ray built and sold thousands of boats 28 to 50 feet that were outfitted with the Lofrans Progress 1 anchor windlass. This model has an asymmetrical deckplate made of anodized aluminum. It was replaced with the much-improved and better-looking, Lofrans Project 1000 in 2004. A similar transition took place with many Boston Whaler, Intrepid, and Fountain boats.
The Progress 1 model was an effective windlass, designed to handle rope/chain anchor rodes, but sometimes its spring-loaded pressure finger jammed at the rope-chain splice. Rope that was 9/16” in diameter usually worked OK, but with 5/8” rope, the splice sometimes jammed or damaged the pressure finger or bent the post that supported the pressure finger, which then reduced the mechanism’s ability to manage the rope.

The Project 1000 model features a stainless pressure finger that is oriented in the opposite direction, resolving the issue and working extremely well with both 9/16” and 5/8” inch rope. The pressure finger on the Progress 1 points forward; on the new model, it faces aft.

In addition to functioning better, the newer windlass is made of chromed bronze instead of anodized aluminum and is therefore more durable and better looking.
Replacing the Progress 1 with the Project 1000
The newer Project 1000 windlass has an oval, symmetrical footprint, which doesn’t match the asymmetric footprint of the Progress 1. In the redesign, however, Lofrans maintained the position of the main shaft and the four deck studs, making the replacement fairly straightforward. As a result, switching from one model to the next is work that can be done by a do-it-yourself owner who is motivated and relatively handy with tools.
The only required change will be to the hawse pipe hole where the rope/chain anchor rode passes through the deck. The hole is positioned slightly farther forward, which requires enlarging the existing hole in the deck a bit and dressing the edges of the hole with a thickened epoxy to prevent water penetration.
Imtra then designed a mounting pad for the new windlass made of a rigid, durable Starboard material. This pad is 1/4” thick and 7/8” larger in diameter than the new windlass. Typically, the old windlass will have compressed the deck in places, leaving a permanent depression, so the Starboard pad covers not only the old footprint but also any unsightly marks left behind from the Progress 1 windlass. The Starboard deck pad’s outline mirrors the shape of the new windlass and is pre-drilled for the cutouts of the Project 1000.
In addition, on the underside of the pad, about 1/4” inch from the edge, there is a channel about 1/8” deep and ¼” wide to lay a bead of white silicone caulk. This trench prevents the caulk from squeezing out when the studs are tightened and it seals the pad and the new windlass to the deck.

As a finishing touch, the Starboard pad is delivered in matching “Sea Ray white.”
Steps to Install the Project 1000
When replacing the old windlass, the first step is to remove (and label) the three power cables from the motor. Next, four hex nuts are released and removed from the underside of the flange of the gear box, belowdecks, allowing the gear box to slide off the main shaft. Finally, the topworks section of the windlass is pried up from the deck and removed.
Since the Starboard pad is rigid, you can use it as your template to mark the deck, tracing the cutout where the hawsepipe hole needs to be enlarged with a Dremel tool or a jigsaw. After enlarging the cutout, you must dress the deck with thickened epoxy to prevent water intrusion in the core.

The four deck studs, washers, and nuts are part of the new windlass’ topworks assembly. They drop directly through the holes in the pad as you fit the main shaft of the windlass through the hole in the deck.
Below the deck, the four studs will receive the flange on top of the gear box. Once the lock washers and nuts are tightened up on the studs, the gear box is secured to the underside of the deck.
We refer to this as sandwich-style construction. The topworks assembly including the deck plate, chain wheel, main shaft, and Starboard pad is the top half of the sandwich, the deck is the meat, and the flange and gear box is the bottom half of the sandwich. When the stud nuts are tightened up and wires reattached, feed the anchor rode and get ready to head out and drop the hook.
For more on anchor windlasses, check out “How to Install a New Anchor Windlass” and “How to Choose the Right Anchor Windlass”.
Related Products: