Many boaters, especially those on larger boats, use either a powered or manual windlass to raise and lower the anchor. Don’t have an anchor windlass? Check out our guide to selecting the proper windlass for your vessel.
While windlasses are integral to many boats, they are often neglected on the annual maintenance list. It is a piece of mechanical and electrical equipment that is often on deck and exposed to the elements, and not maintaining it properly can lead to corrosion issues and failed components. That’s why we’ve put together seven helpful anchoring tips for annual maintenance to make sure your windlass and anchoring system runs smoothly all season long.

1. Lubricate Moving Parts
When it comes to inspecting your windlass, start by disassembling the chainwheel and clutch cone system and lubricate all moving parts and fasteners with lithium grease. It is particularly important to clean and grease the surfaces of the two clutch cones and the chainwheel where they meet.
Every windlass is a little different, so be sure to consult the owner’s manual and parts breakdown for your particular brand and model of windlass. If you have a Lofrans or Muir windlass, you can find manuals on Imtra’s website
Below is an example of the clutch cone and chainwheel assembly on a vertical windlass (Figure A) and a horizontal windlass (Figure B)

Figure A Figure B
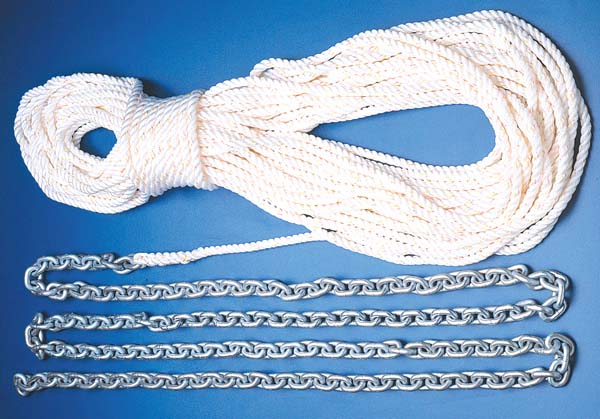
2. Check the Rope/Chain Splice
If you have an anchor rode that is a combination of chain and rope, it is important to inspect the splice, where the rope meets the chain. Most anchor rodes are nylon, which has excellent stretch characteristics for load and shock absorption. However, these nylon rodes tend to shrink at the splice, becoming tight on the chain. As the splice repeatedly gets wet and dries out, the rope clamps down on the first link of chain and becomes inflexible.
If you find that the splice is tight to the chain, your windlass may struggle to transition from rope to chain as you bring the anchor up. When a splice is new, ideally, there is a gap between the chain and the rope, allowing for flexibility as the windlass transitions from rope to chain.
If this is the case, try rolling the splice in your hands and flex and knead it to soften. It’s best if you can see a little daylight between the rope and the chain. If kneading the rope is not loosening and softening the splice sufficiently, then gently work a small flat-head screwdriver or a splicing fid in between the rope and the first link of chain and work the splice loose.
If the rode has stiffened and coils like your garden hose, try soaking it in a bucket of cool water and fabric softener. Avoid warm or hot water as that causes the rope to shrink further. A softer rode means the teeth or groove in the chainwheel can get a better grip on the rope.
If the splice remains tight after trying these tips, you can reverse the rode and re-splice to the bitter end which will likely be a bit softer.
3. Clean & Polish
Use a mild soap and water to clean all chromed or painted parts of the windlass. You can wax and polish the metal surfaces for added protection. This will help protect the windlass from corrosion caused by saltwater on its external parts.
4. Inspect the Entire Rode
It’s always a good idea to take a look at the entire length of chain and rope you have, as you likely don’t see it in it’s entirety very often. Even the rope that’s laid in the locker all season can fray from friction against the chain laying on top of it. Inspect the rope for fraying or any potential snags that could get caught in the windlass or bow roller.
If you use paint or chain markers to show how much rode is deployed, make sure the paint hasn’t worn off or that the chain markers are still in place.

5. Electrical Connections
Inspect all electrical connections and make sure they are both secure and free of corrosion. This includes the connections at the windlass motor itself, the solenoid control box, and the foot-switches/socket for handheld device, or however you control the windlass.
Even though these connections are generally below deck, the wet rope and chain can spray water on them as it is retrieved back into the anchor locker, and that spray can lead to corrosion.

6. Inspect the Motor
If you have a horizontal windlass, where the motor is in a housing above deck, inspect the housing for any cracks or damage. If you notice any, remove the housing and make sure water hasn’t intruded and caused corrosion on the motor.
For a vertical windlass with the motor below deck, check the motor for any corrosion. Like the electrical connections, being below deck doesn’t always mean it remains dry. If it does show signs of corrosion, remove the electrical connections, clean them as best you can, and reattach. If it’s severely corroded and rusted, it may be time to replace the motor.
7. Check Additional Accessories
If you use foot-switches with plastic covers and rubber buttons, be sure to inspect your switches as well. Both the rubber and plastic can get damaged from sun and other elements. Most manufacturers offer the rubber boots and plastic covers as separate replacement parts. Replacing the boot and cover will not only keep your fore-deck looking good, but also prevent the switches from failing.
The same can be said for handheld controls or panels that live on deck, so be sure to check those, as well as any socket on deck that they may plug into.
Final Thoughts
The windlass on your boat may not seem like the most important piece of equipment, and you may not even use it that often, but when you need it most on a windy day in a crowded anchorage, you want to be sure that it is running properly. Following these steps on an annual basis will help you ensure a long lifespan for your windlass, and save your back and arms from having to lift the anchor by hand.
Next: Check out our video series demonstrating many of these maintenance tips on a Lofrans Tigres!
Related Articles
How to Choose the Best Anchor Rode for Your Boat
Tips for Troubleshooting an Electric Anchor Windlass
How to Choose the Right Anchor Windlass
How To Install a New Anchor Windlass
7 Tips for Annual Maintenance of Your Anchor Windlass